
From Cave Art to VR: Building Immersive Exhibitions Using Film Footage
Learn how to turn documentary footage into VR or 360° exhibitions with rights clearance, texture baking, and museum-ready UX.
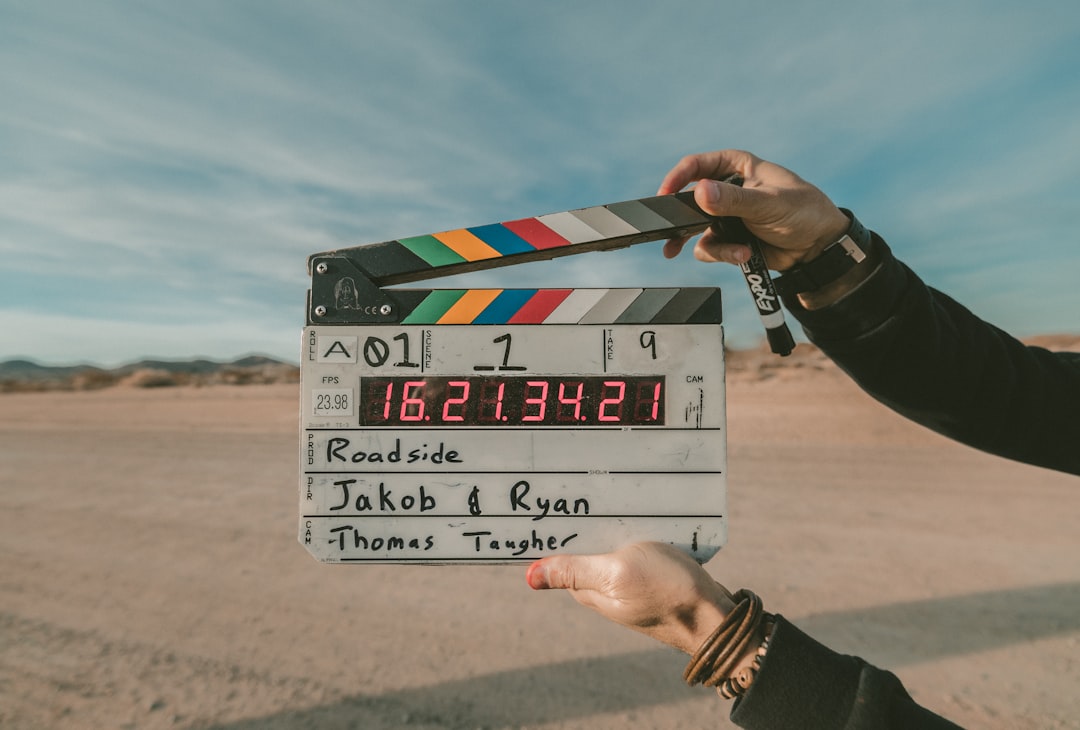
Werner Herzog’s return of Cave of Forgotten Dreams to IMAX and 6K is a reminder that “immersion” is not new—it’s just getting better tools. Museums, creators, and publishers now have a practical opportunity: take documentary footage, archival film, and short-form art clips, and turn them into a VR exhibition or 360 video experience that feels cinematic, educational, and commercially viable. The key is not simply repackaging footage; it’s designing a story system that respects the original film, clears the rights properly, and translates visual depth into spatial UX.
If you are building with analytics and creation tools that scale, or you’re producing a museum installation that needs to work across headset, kiosk, and web browser, this guide walks through the full pipeline. We’ll cover storyboard planning, rights clearance, texture baking, interface design, platform delivery, and the practical choices that make immersive storytelling feel intentional rather than gimmicky. Along the way, we’ll connect the process to asset strategy, because the best immersive projects are built from reusable documentary assets, not one-off experiments.
1. Why film footage is such a powerful starting point for immersive exhibitions
Documentary footage already carries narrative authority
Film footage works so well in immersive settings because it already contains motion, timing, framing, and emotional pacing. A documentary sequence about cave paintings, for example, doesn’t just show the surface of the wall; it gives you context, scale, sound, and a human point of view. When you adapt that material into VR or 360°, you preserve the credibility of the documentary while adding spatial presence. That combination is powerful for museums because visitors want both learning and awe, not just spectacle.
This is where the discipline of capturing a live moment matters: the best immersive work preserves texture, atmosphere, and context that standard social clips flatten. A close-up of pigment grain, a torch-lit tunnel, or a narrator’s pause can all become cues in the spatial experience. Instead of replacing the film, the immersive format extends it into something visitors can inhabit. In other words, you are designing a second reading of the same material.
Cave paintings are especially suited to immersive storytelling
Cave paintings are among the most natural subjects for spatial storytelling because they were originally encountered in darkness, by moving light, at intimate distance. That means the subject itself already suggests a body-centered viewing experience. A traditional flat screen can explain the cave, but a well-built immersive exhibition can help the audience feel the scale, the difficulty of access, and the fragility of the environment. This is particularly valuable for heritage institutions that need to protect originals while still making them emotionally legible.
Creators often overestimate the technical complexity and underestimate the story logic. The real question is not “How do we make it 360?” but “What does a visitor need to understand, feel, and remember in this room or browser window?” To answer that well, many teams borrow methods from rapid creative testing and learning with AI, using small prototypes to validate pacing, legibility, and comfort before full production.
Immersive does not mean higher resolution alone
Many teams mistakenly think that immersion is just a technical upgrade: more pixels, more camera angles, more headset compatibility. In practice, immersion comes from a coordinated set of cues: depth, motion parallax, environmental sound, interface restraint, and clear navigation. If you overload the user with too much movement or too many hotspots, the experience feels chaotic rather than absorbing. The goal is not to impress the viewer with tech; it’s to make the content disappear into the experience.
Pro tip: The strongest immersive exhibitions are usually built on a “less, but better” rule. One emotionally precise scene with strong sound design and a clear spatial path often beats ten overloaded hotspots and a dozen mini-panels.
2. The production workflow: from documentary sequence to immersive asset
Start with an asset inventory, not a camera plan
Before you design a VR exhibition, audit what you already have. Inventory the documentary’s interviews, b-roll, stills, behind-the-scenes footage, ambient sound, archival inserts, captions, and any unused alternate takes. This is the moment to think like an asset library manager rather than a film editor, because immersive projects benefit from modular content. A 20-second hallway shot may become a panoramic transition, while a macro shot of pigment flakes may become a texture reference or animated overlay.
If your team needs a framework for organizing creative materials, look at building a portfolio of structured assets and transforming big ideas into creator experiments. The same logic applies here: break the source film into reusable units. This makes later steps like licensing, annotation, localization, and alternate exports much easier. It also helps museums preserve the intellectual value of the work beyond one exhibition.
Choose the immersive format based on narrative function
Not every story belongs in the same format. A reflective, linear narrative about cave conservation might work best as a cinematic VR film with guided viewpoint changes. A more exploratory educational piece could live as a 360 web experience with clickable chapters, map overlays, and object callouts. If the audience needs mobility and accessibility, the browser version may be the better flagship, with headset support as a premium layer rather than the only delivery path.
For teams balancing multiple creative options, it helps to think like organizations comparing product modes or content formats. Articles such as why simulation still matters and bundle-smart selection guides offer a useful analogy: test formats in small batches before scaling the full experience. If your footage is visually dense but narratively simple, a 360 scene may be enough. If the material depends on emotional choreography, the headset route may justify the extra effort.
Storyboard for gaze, motion, and attention path
Classic film storyboards show camera angles. Immersive storyboards must show gaze direction, interaction points, comfort zones, and fallback states. You need to plan where the user is expected to look, when the environment will cue them to move, and how the scene will behave if they don’t interact. This is especially important in museum settings where visitors may arrive in groups, stand at different distances, or use kiosks for only a few minutes.
A strong storyboard includes three layers: narrative beats, spatial beats, and interface beats. Narrative beats explain what the user learns; spatial beats show where they are relative to the cave, artifact, or narrator; interface beats define labels, prompts, and accessibility content. Teams that organize content with a clear teaching structure often borrow from syllabus design under uncertainty, because the same principle applies: each scene should answer what comes next, why it matters, and how the audience should move through it.
3. Rights clearance: the non-negotiable foundation
Clear every layer of rights before you ship
Immersive exhibition work often combines many rights categories at once: documentary footage, music, narration, archival stills, museum collections imagery, interview releases, and location permissions. If you only clear the original film but forget the underlying stills or soundtrack stem, you can create an expensive legal problem later. Rights clearance should be treated as part of the creative workflow, not a final legal checkbox. In practice, the safest path is to build a rights matrix before editing begins.
That matrix should specify who owns each asset, what territory the license covers, what platforms are allowed, whether edits are permitted, and whether derivative experiences like VR or 360 web are included. This matters because “digital use” is often not enough language for immersive projects. You want explicit terms for headset deployment, online streaming, museum kiosk distribution, press clips, and promotional cutdowns. If you’re managing partnerships or sponsorships around the project, data-driven sponsorship pitches can also help you package the experience without overpromising rights you don’t have.
Use a rights clearance checklist that mirrors distribution plans
Clearance should be mapped to actual use cases: in-gallery VR headset, public web browser, educational licensing, press preview, and social teaser. Each of these may require different approvals. For example, a clip that is legal for a museum kiosk may not be cleared for commercial online distribution. Similarly, music that works in a physical space may be restricted in a monetized web experience. Keep written documentation, not just verbal permission.
Teams working in public-facing spaces should also think about trust and compliance. The same discipline behind trust-first rollouts applies here: when you can show a transparent rights trail, partners move faster and legal risk goes down. Museums, schools, and cultural institutions are especially sensitive to provenance. A clean rights package can be just as valuable as the original footage.
Build derivative-safe asset versions from the start
One of the smartest production habits is to create derivative-safe source files from day one. That means clean masters, textless versions, alternate aspect ratios, caption-ready exports, and separate audio stems. If you later need to convert a sequence into a 360 web opener, a headset intro, or a vertical social teaser, you won’t have to rebuild the asset pipeline. You’ll simply repurpose the approved components.
For creators who want to monetize or showcase their own clips, this is also where creator-friendly asset discipline pays off. Think of your project as part exhibition, part product line. If your source material is organized well, you can easily create teaser clips, educational excerpts, and behind-the-scenes breakdowns. That approach is similar to the way event sponsors build local visibility or how local offers beat generic coupons: specificity wins because it feels intentional.
4. Texture baking, visual translation, and spatial polish
When film frames become environment surfaces
Texture baking is the bridge between film and immersive environments. In a VR exhibition, you may extract surface details from footage or stills—stone, pigment, dust, cloth, light falloff—and bake them into textures for 3D props, walls, labels, or navigational elements. This does not mean copying the film frame wholesale. It means translating useful visual qualities into surfaces that support the environment’s realism and mood. The result is an exhibition that feels cohesive rather than stitched together.
For example, a cave wall seen in documentary footage can inform a normal map, roughness map, or ambient occlusion texture used in a 3D reconstruction. A lantern glow can inspire a subtle emissive layer that guides the eye without becoming theatrical. Even typography can borrow from the palette of the source film, provided readability remains high. If your team needs inspiration for interface polish and visual hierarchy, design strategies for stunning interfaces can be a helpful adjacent reference.
Use textures to preserve atmosphere, not just realism
Realism is valuable, but atmosphere is what keeps people inside the experience. A slightly roughened wall, a grain-preserved vignette, or a dim falloff can recreate the emotional conditions of the original scene more effectively than perfect photogrammetry. This is where the cinematic quality of documentary footage becomes more than reference material. It becomes a mood system that governs how the entire experience feels.
Creators sometimes overcorrect and make immersive spaces too sterile, especially when they are afraid of visual noise. But cave environments, archive spaces, and museum holdings all have texture, patina, and shadow. If you strip that away, the result may be technically clean but emotionally flat. This same lesson shows up in other creative fields where atmosphere drives response, such as genre marketing rooted in cultural context and communicating change without losing ritual value.
Keep performance budgets in mind when baking assets
Immersive experiences live or die on performance. A beautiful texture is useless if it tanks frame rate on a museum headset or causes stutter on mid-range browsers. Bake to the lowest acceptable budget, and create multiple levels of detail. Use optimized atlases, compressed formats, and staged loading so the user isn’t waiting for assets to appear. The more complex the source footage, the more disciplined you need to be in reduction.
Think of this like operational planning for any content system: the asset must work in the real environment, not just the ideal one. That’s why teams comparing tools and workflows often reference articles like toolstack reviews for scalable creation. The same principle applies to immersive design: choose a pipeline that supports render quality, accessibility, and maintainability, not just showcase screenshots.
5. UX for museums: make immersion legible, comfortable, and inclusive
Design for first-time users, not VR veterans
Museums serve a broad public, including people who may never have worn a headset or navigated a 360 interface. The UX must therefore be obvious from the first second. Put the interaction rules on screen, keep controls minimal, and provide a visible way to pause, restart, or switch to guided mode. If the user is confused, the magic collapses instantly. The experience should feel intuitive even when the content is sophisticated.
Use a short onboarding sequence that teaches only what is necessary: how to look around, how to move, how to select, and how to exit. Avoid jargon. A visitor should not need a technical manual to explore a cave, gallery, or reconstructed scene. This mirrors the logic behind adding achievements to non-game content: the mechanics should support the content, not overpower it.
Comfort is a storytelling issue, not just a technical one
Motion sickness, visual overload, and poor spatial scale can break the emotional spell. Use slow, predictable camera movement. Give users stable reference points. Avoid abrupt acceleration, forced rotation, or rapid teleportation unless they are justified by the story. In a cave exhibition, for instance, movement should feel like careful exploration rather than a video game sprint. The user needs enough sensory stability to absorb the historical context.
Good UX also means respecting visitors who prefer a passive mode. Offer an auto-guided path with optional hotspots, captions, and narrated wayfinding. In high-traffic museum environments, many people will only spend a few minutes per station, so you need both a quick overview and a deeper branch. For teams building audience-centered experiences, the practical thinking in narrative framing and legacy-brand independence can be instructive: preserve the essence while adapting the format.
Accessibility should be embedded in the interaction design
Accessibility in immersive work means more than subtitles. It includes readable contrast, audio descriptions, alternative navigation paths, seated-friendly kiosk height, reduced-motion settings, and fallback 2D playback for users who cannot use headsets. For web deployments, keyboard navigation and screen-reader-compatible metadata should be planned early, not retrofitted. Institutions that handle public information well tend to invest in structure and clarity, much like the approach described in enhanced data practices that improve trust.
The best museum UX gives everyone a dignified path into the content. That includes visitors with sensory sensitivity, attention differences, or limited mobility. Your immersive exhibition should feel like an invitation, not a test. That’s especially important when the subject is ancient or fragile, because the experience should communicate care, not just novelty.
6. Delivery formats: headset, kiosk, and 360 web
Choose the right container for your audience and budget
There are three common delivery paths for documentary-driven immersive content. Headset VR is ideal for depth, presence, and controlled viewing. Kiosk-based installations are great for museum floor traffic, shared education spaces, and supervised interaction. 360 web experiences offer the widest reach because they can be shared through a browser, embedded in editorial stories, or used in classroom contexts. Each has different strengths, costs, and maintenance needs.
The right choice often depends on where the story does its best work. A contemplative cave sequence may thrive in a headset, while a multi-stop documentary exhibit may be easier to navigate in a browser. If you are trying to maximize discoverability and repeat usage, the browser version can act as the top-of-funnel experience, with the headset as the premium extension. This is similar to evaluating physical versus digital distribution in new ad platform features and platform volatility lessons: format is strategy.
Plan exports early to avoid rework
Each delivery path requires different technical exports, metadata, and QA checks. A web build may need adaptive bitrate video, lightweight textures, and click-safe hotspots. A kiosk build may need offline playback, locked-down navigation, and auto-reset behavior. A headset build may need stricter frame rates, comfort settings, and controller compatibility. You can save enormous time by deciding on these constraints before final rendering.
If your team is balancing creative ambition and budget discipline, the logic in balancing ambition with fiscal discipline is a useful reminder. A successful immersive project is not the most elaborate one; it’s the one that ships cleanly, performs well, and can be supported after launch. That means fewer surprises in final QA and fewer emergency re-exports.
Let the web version extend the exhibit’s life
A 360 web experience can become the long-tail version of your exhibition. It can support press, education, donor relations, and remote audiences long after the physical installation ends. It can also serve as a proof-of-concept for future museum partnerships or sponsored showcases. In many cases, the web version is not a lesser version; it’s a different audience product with its own value proposition. When packaged well, it can help creators and institutions monetize or circulate the same storytelling assets more effectively.
Creators who want to publish or sell assets should think carefully about discoverability. Strong packaging, clear licensing, and memorable visual hooks help the project stand out in a crowded market. That is why experiences and product pages that feel personal often outperform generic ones, much like the lesson in personal local offers and budget-aware product positioning.
7. A practical step-by-step production checklist
Step 1: define the story beat and audience job
Start by writing one sentence that explains what the audience should learn or feel. Then identify the primary audience: museum visitor, educator, film fan, student, donor, or online viewer. Next, decide whether the experience should be contemplative, explanatory, exploratory, or promotional. This one sentence will protect you from scope creep later, because every scene should serve that job. If a sequence does not reinforce the main intent, cut it or reserve it for a bonus layer.
Step 2: audit the film assets and clearance status
List all footage, audio, stills, graphics, and archival elements. Mark what is owned, licensed, ambiguous, or missing. Then document what can be used in headset, web, education, or promotional formats. This step is where many projects fail because they assume a film license automatically covers derivative immersive work. It often does not. Treat the clearance audit as your production map.
Step 3: storyboard the spatial journey
Design the experience as a series of spatial beats, not just scenes. Where does the viewer begin? What do they notice first? Where is the environmental transition? What is the emotional peak? What is the exit? The spatial journey should make the documentary’s logic feel inevitable. If needed, sketch each sequence from the user’s point of view and write the interaction pattern beside it.
Step 4: prototype with limited assets
Build a small vertical slice before full production. Use one environment, one voiceover segment, one hotspot cluster, and one transition to validate the experience. Test it with users who do not know the material. Ask where they looked, what they understood, and where they felt disoriented. That feedback will tell you whether the experience is emotionally readable before you invest in the rest.
Step 5: texture, optimize, and ship in the correct format
Convert selected film textures into environment assets, simplify geometry where needed, and ensure all media is compressed for the intended devices. Make sure captions, audio descriptions, and fallback versions are included. Then run a final QA pass on actual target hardware. If you’re also maintaining a content library, use your learnings to improve future packaging, just as creators refine templates after each release. That’s how a one-off exhibition becomes a repeatable workflow.
8. Common mistakes and how to avoid them
Over-interpreting the source footage
The biggest mistake is trying to force the documentary into an overly complex 3D world. If the footage already has a strong emotional architecture, don’t bury it under unnecessary spatial tricks. Let the film lead and the immersive environment support it. The audience is there to understand the subject, not to admire your rendering pipeline. Respect the source material’s voice.
Ignoring the limits of attention in public spaces
Museum visitors are distracted, mobile, and time-limited. They are not sitting through a feature-length VR installation in perfect conditions. Keep interactions short, labels readable, and transitions obvious. If the exhibition is likely to be used in shared spaces, avoid requiring sustained concentration for every essential idea. Use layered depth so the casual viewer and the committed learner both get value.
Skipping the post-launch maintenance plan
Immersive projects age quickly if nobody owns updates. Web browser changes, headset firmware shifts, broken links, and content-license expirations can all damage an otherwise excellent exhibition. Create a maintenance calendar and assign responsibility. A beautiful experience that silently breaks after launch is not truly finished. The same operational mindset used in sponsorship ecosystems and trust-first deployment planning applies here: support the system, not just the launch.
| Format | Best Use Case | Strengths | Risks | Typical Production Priority |
|---|---|---|---|---|
| Headset VR | High-immersion museum exhibit | Presence, depth, emotional focus | Comfort issues, hardware support | Highest fidelity, strict optimization |
| 360 Web | Editorial, classroom, remote access | Easy sharing, low friction | Lower presence, browser variance | Accessibility, fast load times |
| Kiosk Installation | On-site museum interaction | Controlled environment, guided UX | Hardware maintenance, queue limits | Reliability and reset behavior |
| Cinematic VR Film | Narrative-led documentary adaptation | Strong storytelling, cinematic pacing | Passive if overused, less exploration | Storyboard clarity and sound design |
| Hybrid Exhibit | Large institutions and touring shows | Flexible, multi-audience reach | More coordination, more content variants | Unified asset system and rights matrix |
9. FAQs for museums and content creators
What kind of documentary footage works best in a VR exhibition?
Footage with strong environmental context usually performs best: walkthroughs, close detail shots, atmospheric b-roll, and scenes where sound matters as much as image. Material about heritage, archaeology, conservation, or behind-the-scenes craft adapts especially well because it benefits from spatial presence. The key is to choose footage that already suggests a place the audience wants to inhabit.
Do I need separate rights clearance for 360 web and headset VR?
Usually yes, or at least explicit permission that covers derivative immersive formats. Many licenses are written for linear film, social distribution, or internal use only. If the project will be monetized, publicly exhibited, or embedded on the web, make sure the agreement names those uses clearly.
What is texture baking in this context?
Texture baking is the process of turning visual detail from film reference or source imagery into optimized textures for 3D environments and assets. In immersive exhibition work, it helps translate the mood and materiality of the footage into walls, props, signage, and navigational elements. It’s one of the main ways documentary visual quality becomes spatial design.
How do museums make VR comfortable for non-gamers?
Keep controls simple, reduce motion, provide clear onboarding, and offer a passive or guided mode. Avoid forcing users to learn game-style mechanics just to access the content. Museums should prioritize comfort, comprehension, and accessibility over novelty.
Can a 360 web experience still feel premium?
Absolutely. Premium feel comes from narrative clarity, high-quality audio, elegant UI, fast load times, and thoughtful interaction design. A browser experience can be more polished than a headset build if it is carefully optimized and well written. Many audiences actually prefer browser access because it is immediate and shareable.
What is the biggest mistake teams make when repurposing film footage?
The most common mistake is treating the footage as raw material for effects instead of as an authored narrative asset. If you strip away pacing, rights, context, and accessibility, the result may look impressive but feel empty. Successful immersive work preserves the documentary’s meaning while adapting its form.
10. Conclusion: build immersion as a system, not a one-off effect
From ancient cave paintings to modern VR, the throughline is the same: people want to step closer to meaning. Documentary footage gives you the raw material, but the immersive exhibition is what turns that material into a lived experience. When you approach the project with careful storyboarding, clear rights clearance, efficient texture baking, and museum-friendly UX for museums, you create something that honors the source and expands its reach.
For creators and institutions alike, the opportunity is bigger than a single show. A well-structured immersive project becomes a reusable content system: one that can support education, press, touring installations, web publishing, and future licensing. That’s why asset discipline matters so much. It turns documentary footage into a durable creative product, not just a temporary attraction. And if you keep refining your workflow, each new exhibition gets easier to build and more powerful to experience.
Related Reading
- Smart Home Savings: When to Buy Govee Lighting and Gadgets for the Best Price - Useful for thinking about staged upgrades and smart budgeting for exhibition hardware.
- Is Your Phone the New Front Door? What Digital Home Keys Mean for Renters and Landlords - A practical lens on identity, access, and frictionless user entry.
- Rapid Creative Testing for Education Marketing: Use Consumer Research Techniques to Improve Enrollment Campaigns - A strong model for testing immersive prototypes with real users.
- Trust-First AI Rollouts: How Security and Compliance Accelerate Adoption - Helpful for structuring governance, permissions, and rollout confidence.
- From Cult Ritual to Accessible Show: Communicating Changes to Longtime Fan Traditions - Great reference for adapting cherished experiences without losing their core identity.
Related Topics
Daniel Mercer
Senior SEO Content Strategist
Senior editor and content strategist. Writing about technology, design, and the future of digital media. Follow along for deep dives into the industry's moving parts.
Up Next
More stories handpicked for you

Remastering for IMAX: How to Prepare Archival Film Stills and Clips for High-Resolution Campaigns

From Recital to Release: Strategies for Showcasing Art Clips Effectively

Tech Innovations: How the Latest Tools Are Shaping Motion Design

Integrating AI Tools for Streamlined Content Creation in the Art World

Quest Types in RPG Design: Exploring Audience Engagement Strategies for Content Creators
From Our Network
Trending stories across our publication group

How Discovery Stories Make Better Product Listings

Ambiguous Portraiture: Creating the Haunting Look of Cinga Samson for Editorial Shoots
From Chauvet to 6K: How Archivists and Creators Can Prepare Visual Work for Immersive Re-releases

How to Turn Risograph Prints into Unique Brand Merch (Without a Million-Dollar Print Run)

How to Stage and Market an Artist’s Retreat: A Guide for Sellers and Hosts
